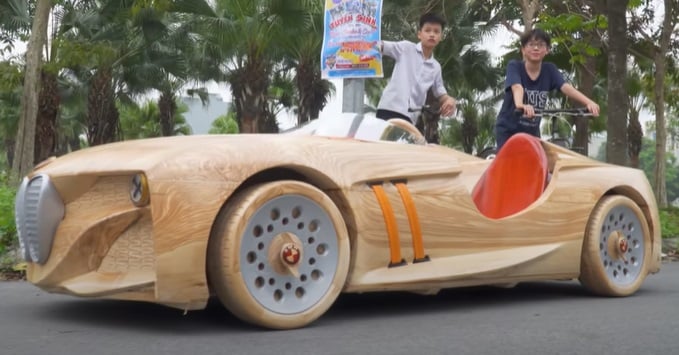
How to Make Your Own Wooden BMW 328 Hommage
This DIY wooden BMW 328 Hommage is just the project for petrolheads who also like woodworking on the side.
If the video player is not working, you can click on this alternative video link.
If you are a petrol-head who also likes a bit of woodworking on the side, then this might be the perfect DIY project for you? Follow this fairly in-depth guide to make your own wooden hommage to the BMW 328 Hommage.
Before we get started we will need some equipment and raw materials before we get started.
Materials and gear needed
- Lumber (reclaimed or new)
- Four trunk slices for the wheels
- Wood glue
- Hand plane
- Child’s electrical car motor and drive chain
- Child’s electrical car/go-kart front steering axle assembly
- Child’s toy car drive chain
- Orange luggage straps
- LED bar lights
- Mini LED tube lights
- Transparent perspex sheet
- Table saw
- Power tools
- Paint spray gun
- Ratchet
- Orbital sander
- Wood router
- Mini lathe
- Angle grinder
- Clear varnish/lacquer
- Chainsaw
- Various nuts and bolts
Step 1: Plan your wooden model of a BMW 328 Hommage
The first step is to grab a piece of paper and pencil and sketch out the design for the car your want to build. This will help you “get your eye in” on the overall design of the vehicle that will help you with the later build.
At this stage, you can also evaluate how big you want the model to be and set the dimensions accordingly on your sketch.
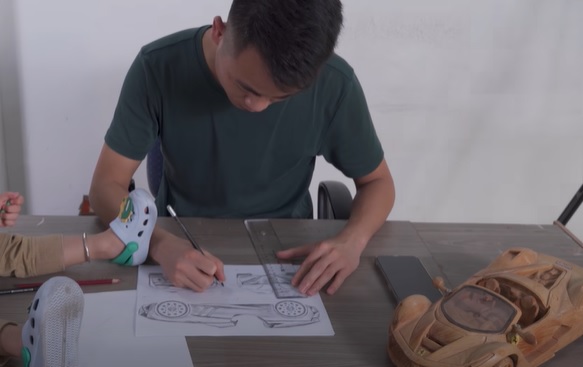
Once complete, grab your lumber and begin to mock up the footprint of the car. Depending on the lumber you have to hand, you may need to cut it to size as well.

Once you are more or less happy, plane down the wood.
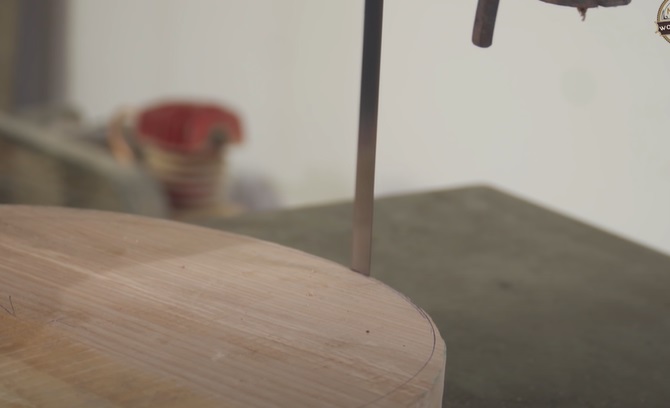
Step 2: Make the wheels
Next, take your rings of wood and mark out the dimensions of the wheels you want for your model wood BMW 328 Hommage. Cut them out using a band saw or similar.
Next, measure and mark out a series of curved trapezoids on some pieces of lumber, and cut them down to size using your band saw. These will be used to build up the rims of the wheels. The amount you need will depend on the size of wheels your planning on making.
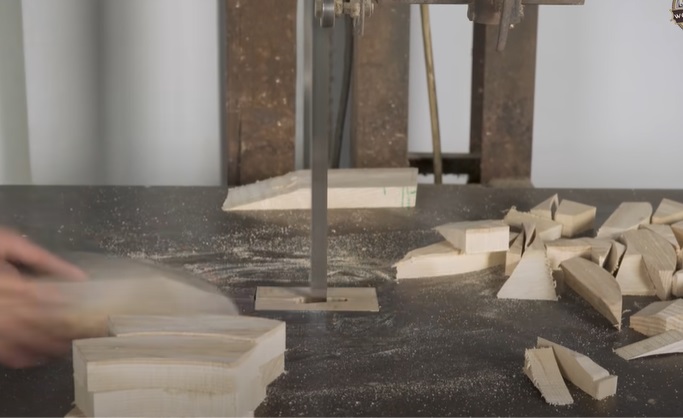
For this build, you will need eight equally-sized pieces per wheel. Glue the pieces around the outer perimeter of each wheel.
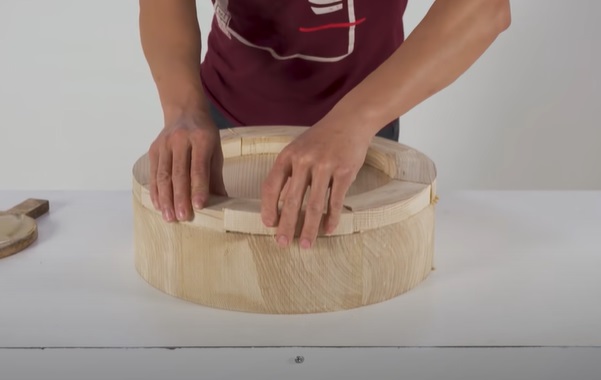
Continue until all four wheels have been completed. Clamp and hold the pieces into place until the glue is fully cured.
Next, transfer each wheel to your lathe and lock it into place. Then begin to work each wheel to make it perfectly circular.
Once complete, begin to round the edges of the “tire” of the wheel. With that complete, begin to work the inside rim of the wheel. You want to attempt to replicate the wheel’s tire’s edge.
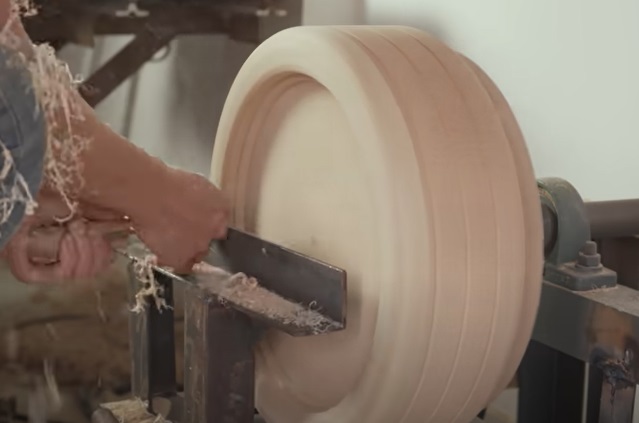
Deepen the inside part of the tire, and begin to work on carving out a central hub.
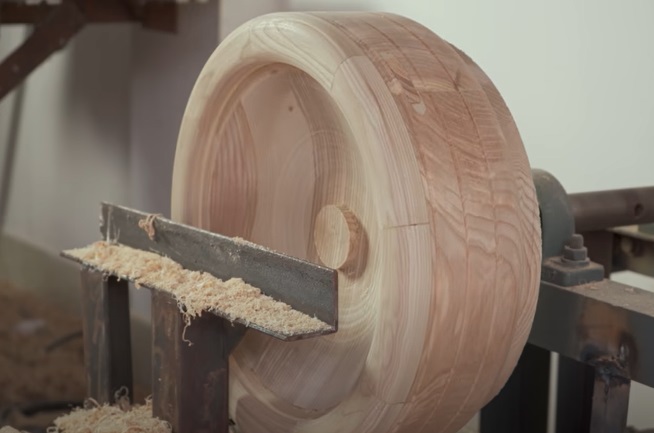
Once complete, remove the wooden tire from the lathe and begin to carve out the tire treads using woodworking tools. You may want to roughly sketch out the design first.

Rinse and repeat for the three other wheels.
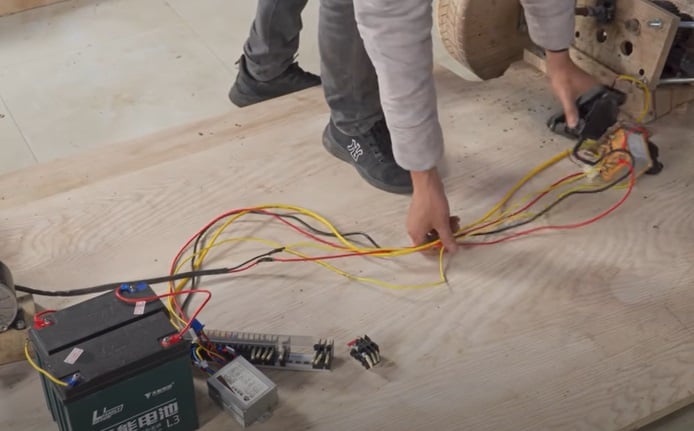
Step 3: Begin to install the drive chain and axles
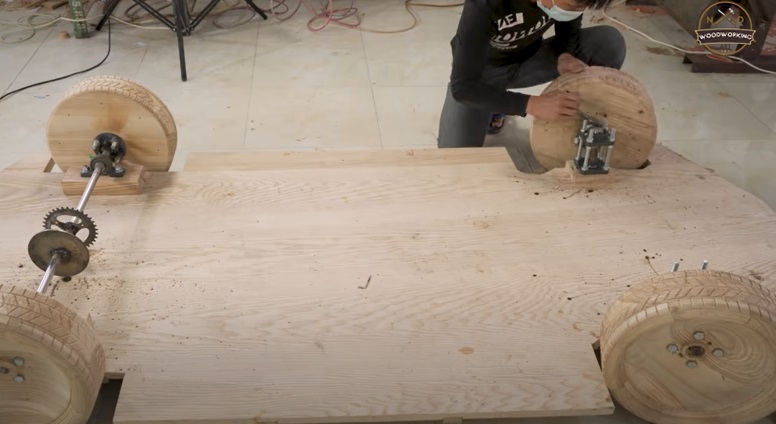
Next, add axle mounting points onto the base of the car and mount the drive axle to them.

With that complete, mount the wooden wheels to the axle hubs and secure them into place with bolts and nuts.
Do the same for the front steering axle mounts.
Next, use a commercially available steering system, or build your own using old cogs, mount into position near the steering axle, connect it up, and add a steering wheel shaft.

Next, take your electrical drive chain, wire it up as needed, and mount it to the base of the car. Connect its motor to the rear-drive axle as required.
Once complete, test the system and make adjustments as needed.
Step 4: Begin to build up the bodywork
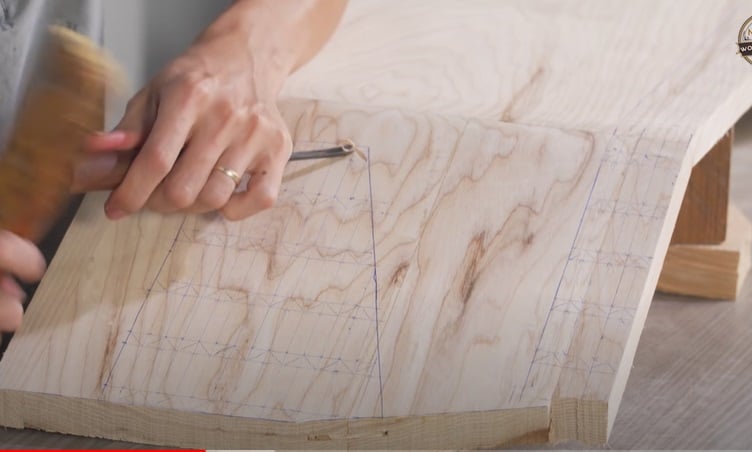
With the main propulsion completed, you can now begin to build up the main body of the car. Make a template of the overall side profile of the car, cut it out, and transfer the design to a piece of lumber.

Cut out the pieces using a band saw as needed. Next, make angled pieces for the front and rear sections of the car and carve out the headlight details, etc, of the wooden BMW 328 Hommage.
Carve out other details too like the grill sections of the front of the BMW 328 Hommage. Use images of the real car for reference here.

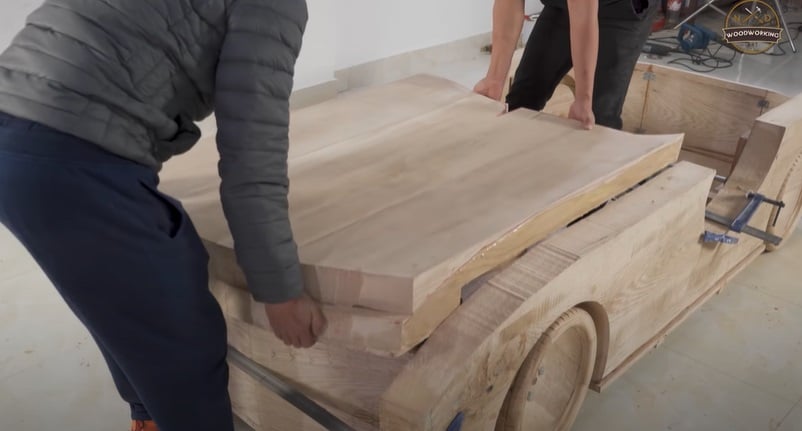
With that complete, take the front, rear, and side wooden parts of the car’s body and mount them into place on the base.
Next, transfer the design for the bonnet, cut out, assemble, and glue it into place on the front of the wooden BMW 328 Hommage.
Do the same for the boot/trunk of the BMW 328 Hommage. Next, sketch and cut out the rough shape of the front grill section of the BMW 328 Hommage.
Once complete, glue into place on the front of the car. This only needs to be a rough outline as we will be finishing the fine detail later with power tools and hand tools.

Do the same for the boot/trunk top details and tail section of the car’s bodywork.
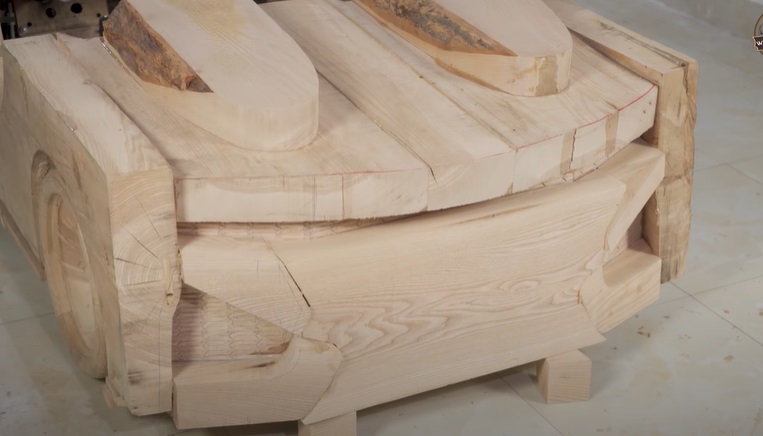
Clamp into place as needed and leave the glue to fully cure before moving on.
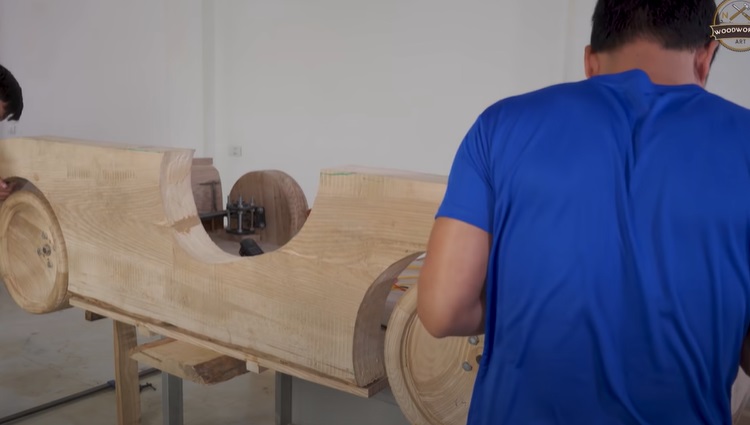
Step 5: Begin to shape the main bodywork
Once all the glue has dried and all pieces and fully secure, you can now begin to work the bodywork. Take your trust chainsaw, and begin to refine the curves of the car as needed.
Be sure to take all the necessary precautions when doing so.
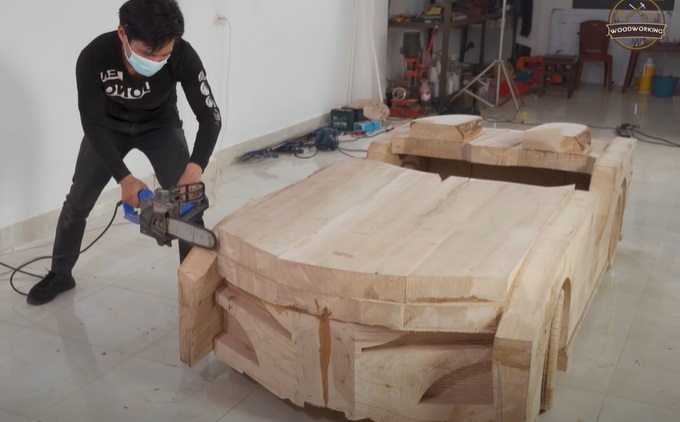
Cut off excess pieces and try to round the edges of the car’s bodywork as needed. This doesn’t need to be perfect at this stage as we will be finishing later with more delicate tools.
Continue around the entire outside of the bodywork back, side, and front until your happy you’ve got the basic rough design for the body.

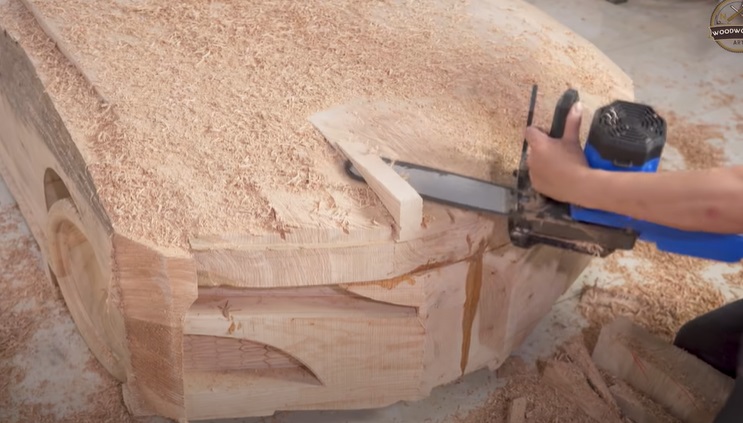
With the rough design carved out, take your angle grinder and begin to refine the form and shape of the BMW 328 Hommage’s bodywork.
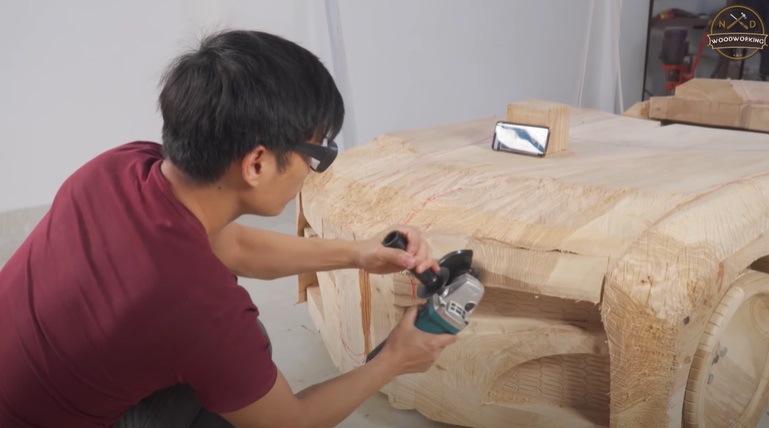
Add in the curved and streamlined features of the bonnet, sides, etc, and carve out spoilers, and other details as needed.
Be sure to have a reference image of the real car to help you out here.

Be sure to care out the details of the top of the dashboard and mark out the position of the windshield too. Where required, take hand router and add other details to the car’s bodywork too.
Finish details using a hammer and chisel too. With the finer details of the bodywork complete, take an orbital sander and smooth down the surfaces of the car’s bodywork.
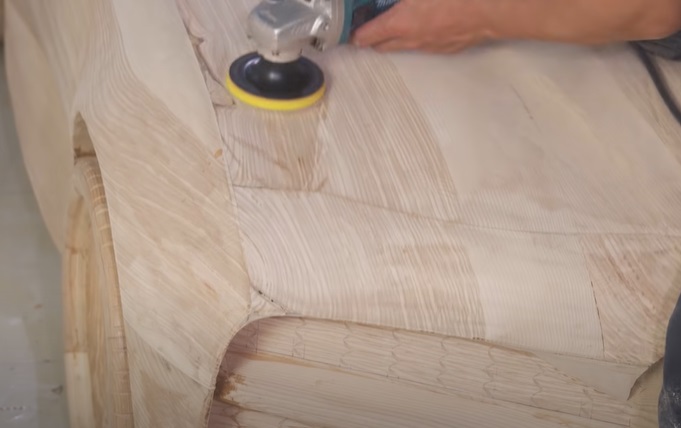
Be sure to wear appropriate respiratory gear when doing this — you don’t want to be breathing a lot of sawdust!
Once complete, you can then continue to add other details of the car using a hammer and chisel, like air intakes on the bonnet, etc.
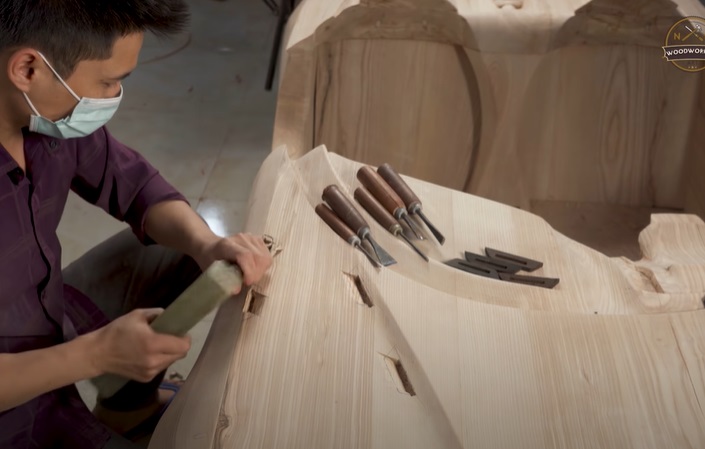
Once complete, and where required, carve out darker wooden details to add to any notches you carved out of the bodywork — like on the bonnet.

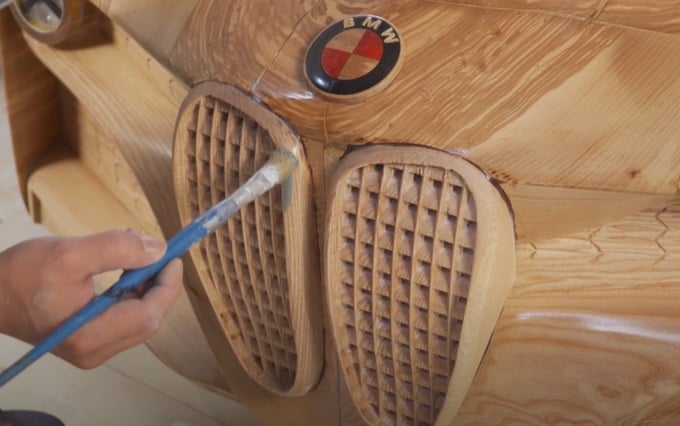
Sand down as needed. Next, carve out the front main grill details of the BMW 328 Hommage, and glue them into place on the front of the car.
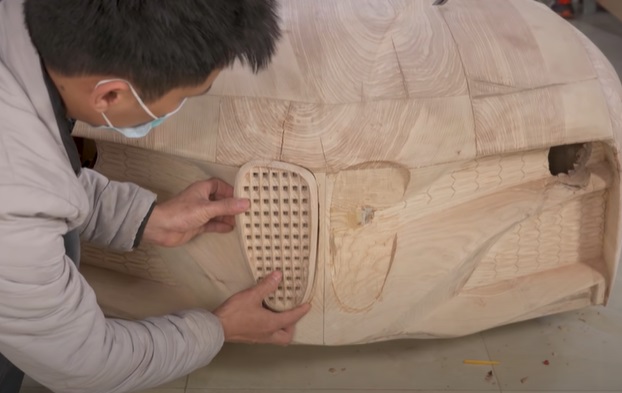
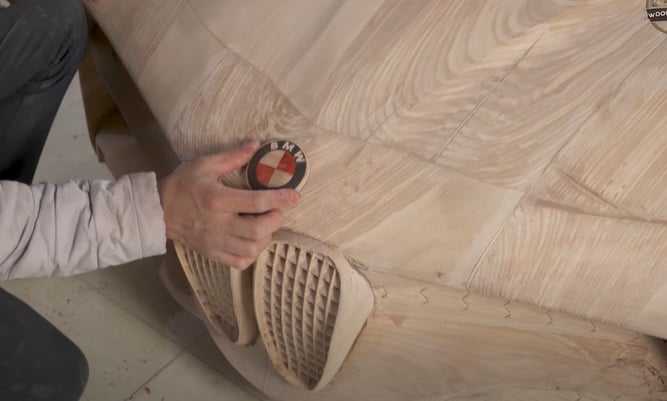
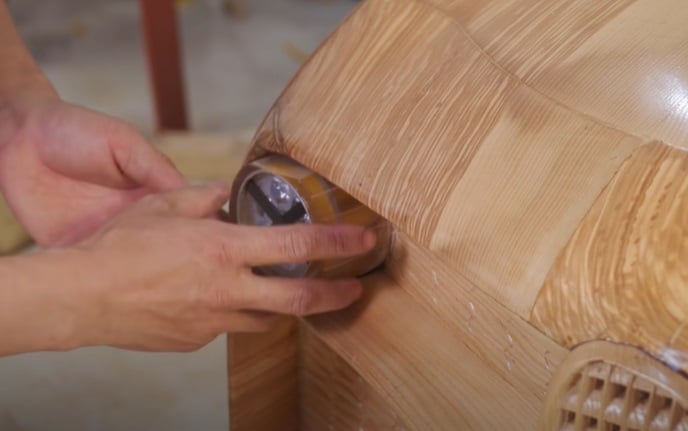
Also, bore some holes through the bodywork where you will be adding lights if any. Make the badges and glue them into place too — you will likely need to route some cavities so that they sit nicely on the car.
Step 6: Complete the interior and tail details
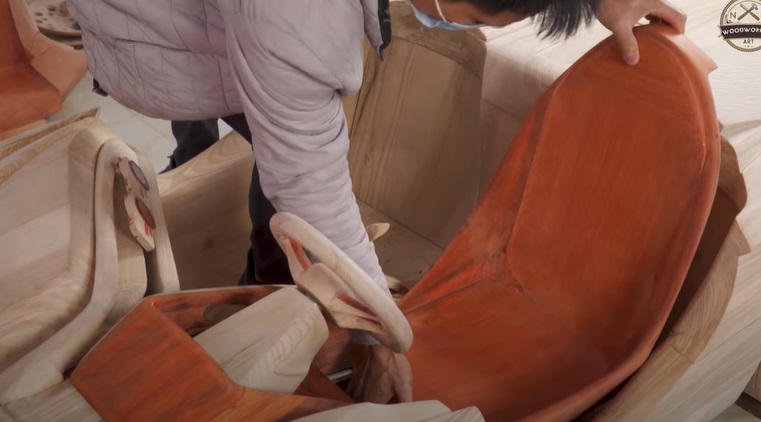
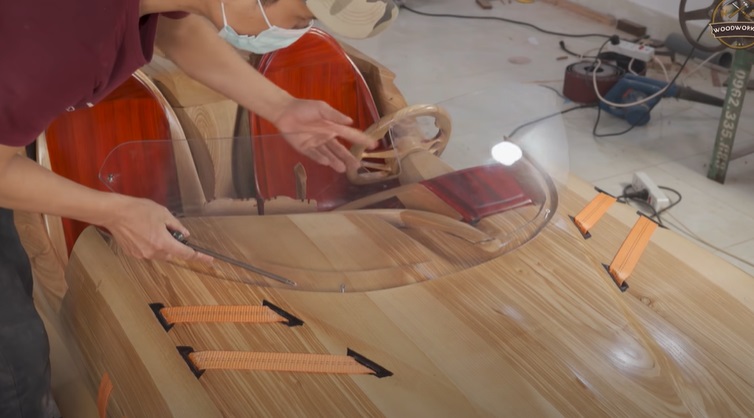
Next, either mock-up and carve out the interior details using the same colored wood, or using a different kind. Once carved out, sander, and buffed, install the interior pieces into the car as needed.

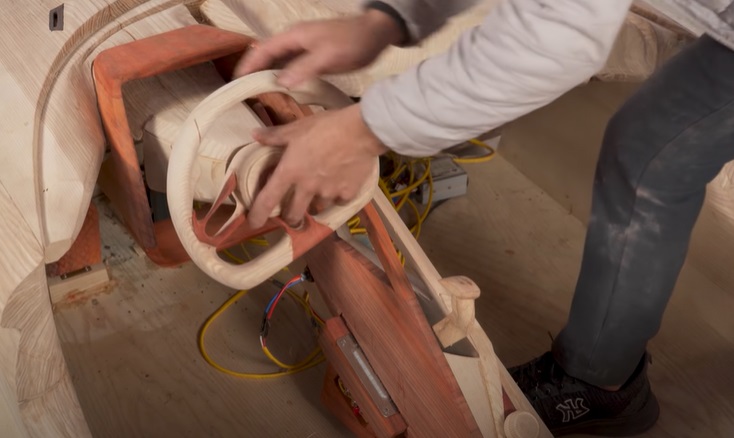
Create a steering wheel (dual-tone or other) and mount that to the steering column.
Next, build up and carve out the seats, and install them as well to the interior of the car.
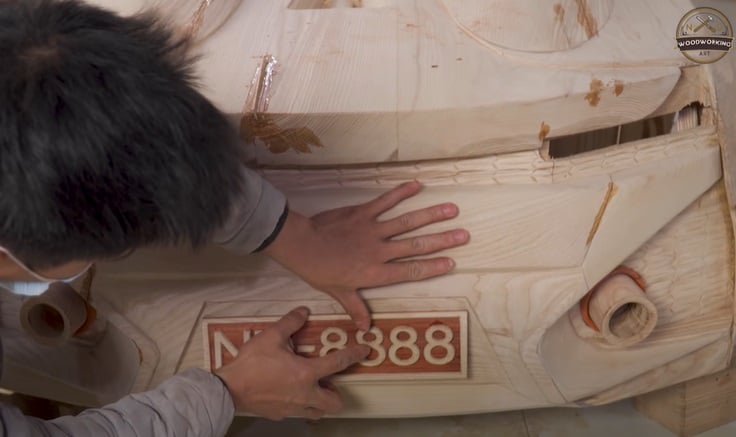
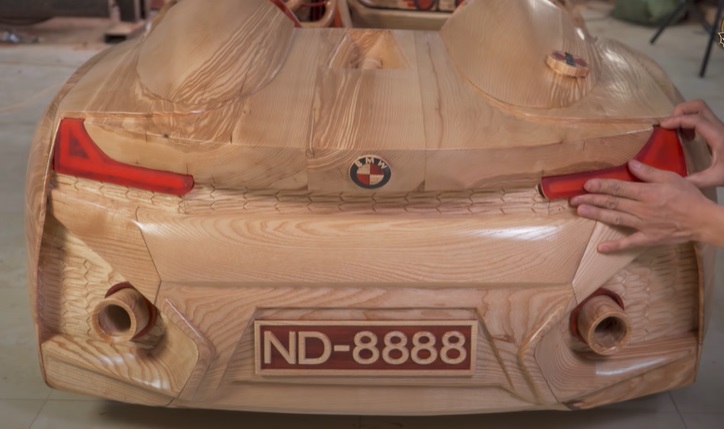
Carve and install other features too, like the rear exhaust pipes and number plates(s). Glue or nail into place as needed.
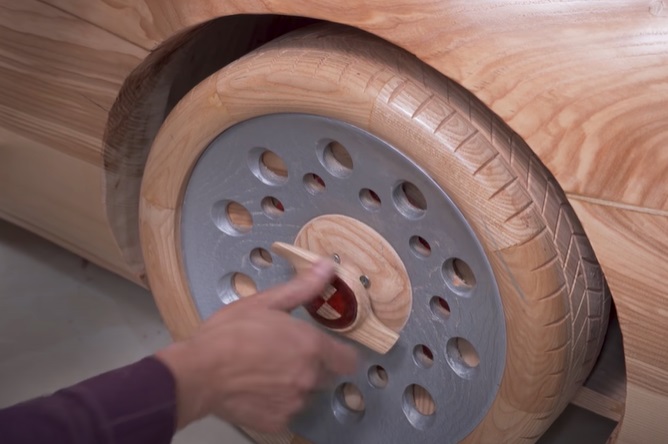
Create and install the fuel tank cap too. Also, design and carve the “alloys” of each tire too and install as needed.
Step 7: Treat and lacquer the wood
With the main bodywork now complete prepare your paint spray gun and spray all exposed surfaces of the car.
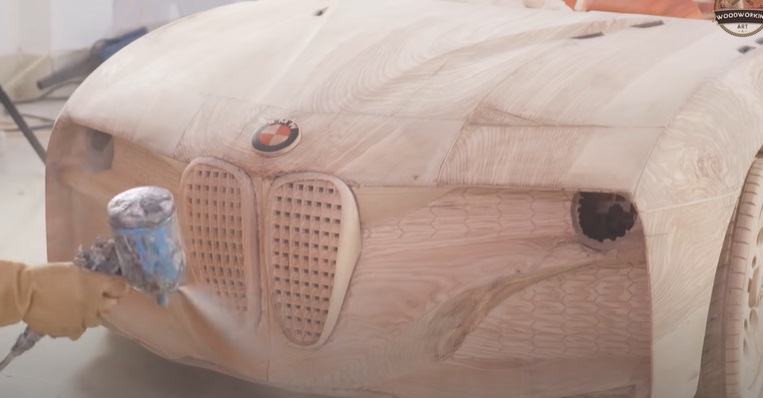
Be sure to get into all the nooks and crannies of the car. You don’t spoil your hard work at this critical point.
Be sure to pay particular attention to the interior of the car — this will likely take the most punishment over the lifetime of your wooden DIY BMW 328 Hommage.

To simulate the stripes on the bonnet and side fenders, use some strips of fabric luggage straps and install them as needed.
Step 8: Install the electrical lighting and other components
Next, grab your LED lights, cut holes for them as needed (if not already complete), and feed the wiring through to the interior of the car.
Wire the lights to the main electrical system, and test them. Adjust as needed.

Next, make the tail lights using strips LED lights, and install as needed. Also, wire up and test these.
Next, make a faux-HUD for the interior, and cut out the windshield from a piece of clear perspex.
Install the pieces needed.
With that complete, you can remove the car’s “alloys”, paint them a gray or silver color, and all add hub cap badges.
Go around the rest of the bodywork, and pick out other details in silver or gray as needed (like the front grill).
Once complete, your DIY BMW 328 Hommage is basically complete. Now all you need to do is take it outside and take it for a much-needed spin!
If you enjoyed this project, you might want to make your own wooden version of another iconic car — the Bugatti Centodieci.
 SHOW COMMENT ()


