This article describes how to use the ReadyNAS backup job manager to back up data from your ReadyNAS to a USB disk.
Not what you're looking for? Return to the ReadyNAS Backup FAQ
- Connect the USB disk to a USB port on the ReadyNAS. If the USB disk is USB 3.0 compatible, then it is best to connect it to a USB 3.0 port on the ReadyNAS. Check the hardware manual for your ReadyNAS to identify which ports are USB 3.0 ports. Once connected, the USB disk should appear under System - Overview:
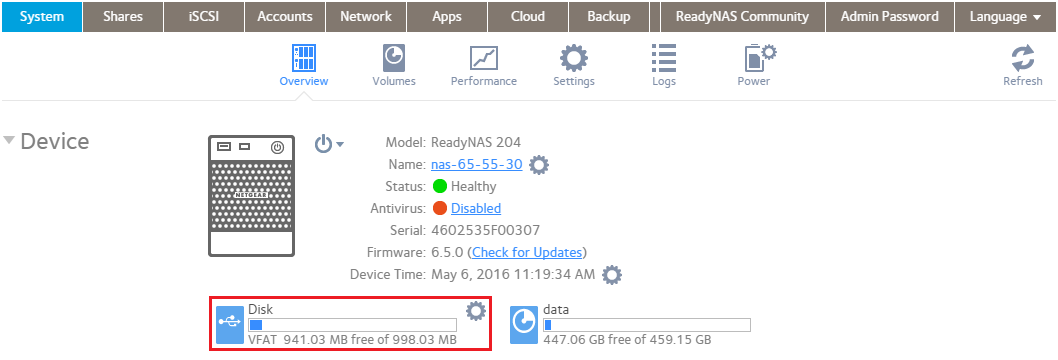
If the USB disk does not appear, see Note 1 at the bottom of this article for troubleshooting tips.
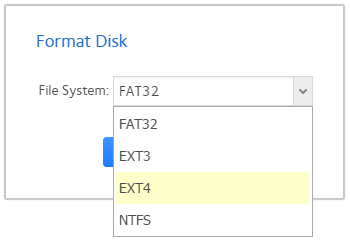
- (Optional) Go to System - Overview. Click on the gear icon beside the USB disk and press Format. Warning! This step will destroy the contents of the USB disk. Remember to copy the data from the USB disk first. If you need to keep the data on the USB disk, do not proceed with this step!

-
Choose EXT4 from the drop down menu and press OK. For best performance with ReadyNAS, we recommend you use EXT4 as the file system for the USB disk (see Note 2 at the bottom of this article for further details).
-
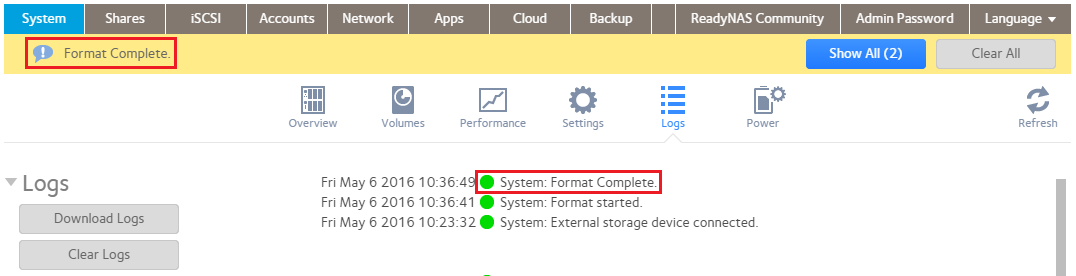
Wait for Format Complete to appear in the logs:
-
Go to Backup and press Add Backup:

-
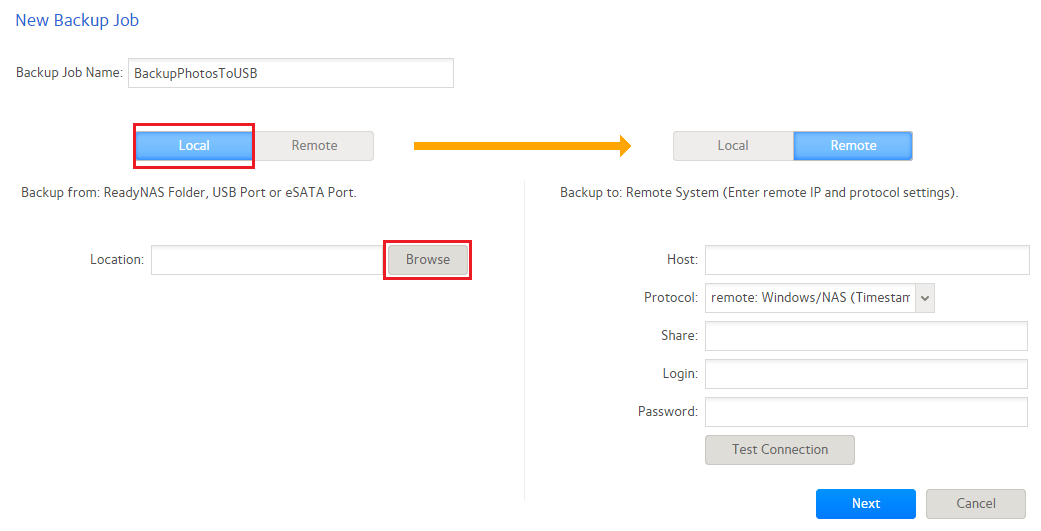
Enter a name for the backup job:

-
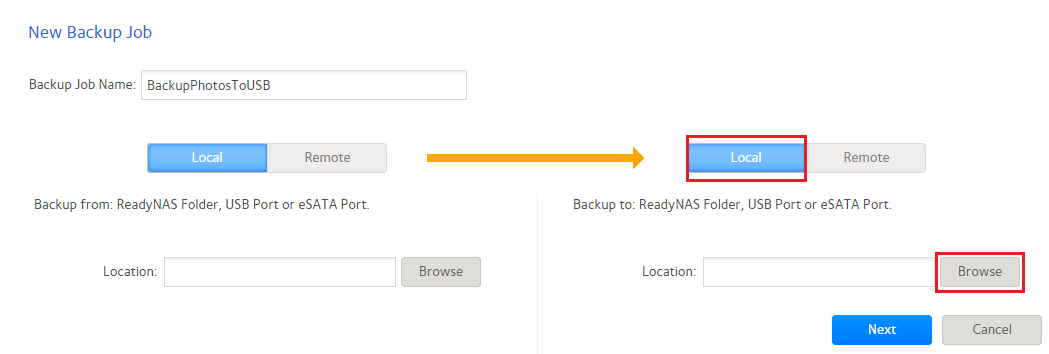
In the left hand side of the backup configuration settings, choose Local and then press Browse. It is local because the data we want to back up is "local" to the ReadyNAS.
-
Navigate through the directory structure of the ReadyNAS and select the folder that you want to backup. Then press Select:
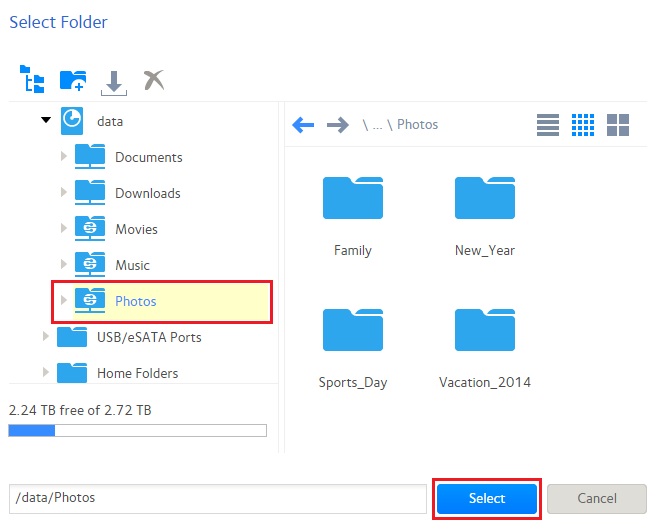
Note: You may also select the entire data volume as the source of the backup but keep in mind that all snapshots will also be backed up. If the snapshots reference a large amount of data, then the destination device may not be large enough.
-
In the right hand side of the backup configuration settings, choose Local and then press Browse. It is local because the USB disk is connected "locally" to the ReadyNAS.
-
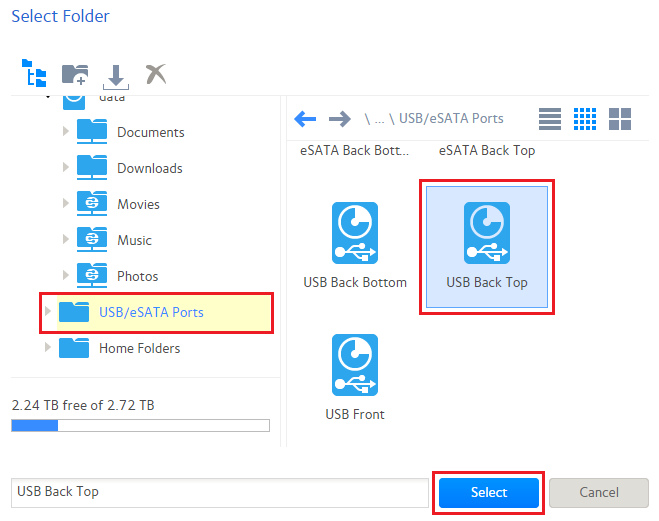
Scroll down to USB/eSATA Ports and then choose the USB port to which the USB disk is connected. In this case, the USB disk is connected to the USB port on the back of the ReadyNAS at the top. Then press Select.
-
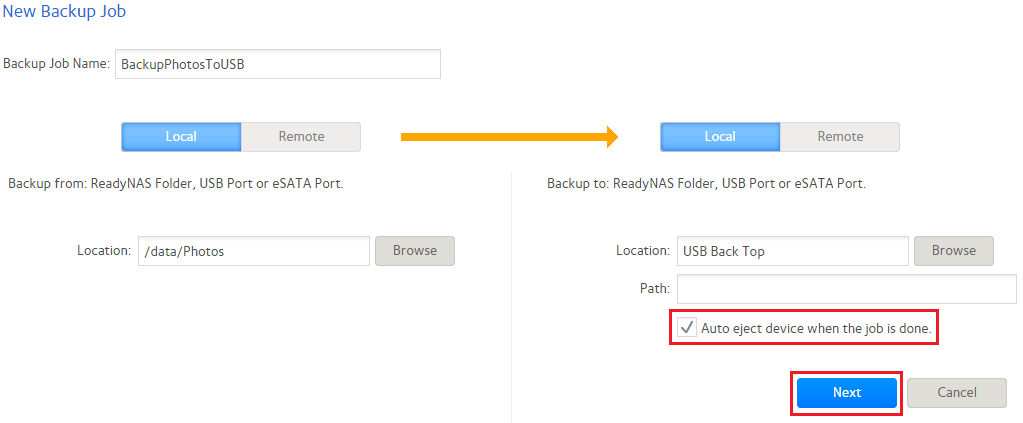
If you wish to have the USB disk cleanly ejected when the job is done (recommended), then select the checkbox Auto eject device when the job is done and press Next.
-
At the next screen, set the schedule as needed:
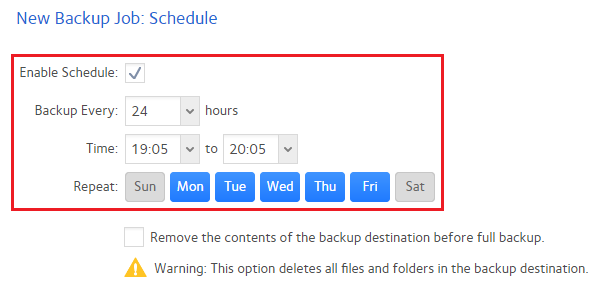
Some common examples are below. Days in blue are enabled; days in gray are disabled.
- To run the backup job Monday to Friday after 7PM, the required configuration is:
- Backup Every: 24 hours
- Time: 19:05 and 20:05
- Repeat: Mon, Tue, Wed, Thu, Fri
- To run the backup job every Saturday night after midnight, the required configuration is:
- Backup Every: 24 hours
- Time: 00:05 and 01:05
- Repeat: Sat
Note that the time that the job is scheduled to run between is used only to specify the time window in which the job is allowed to begin. It does not mean that the job will be stopped if it is still running when that time window expires. Once the job begins, it will continue to run until it is successful or interrupted.
-
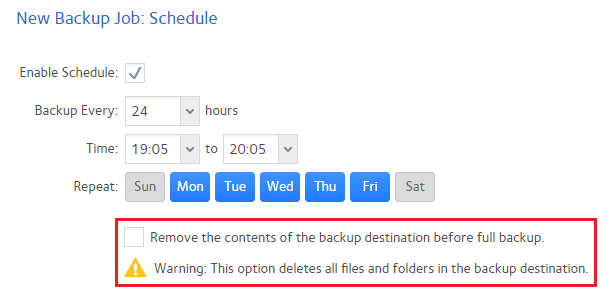
Choose to remove the contents of the backup destination before full backup. This should be used with caution.
-
Press Finish.
-
The backup button prompt appears. Choose Yes if you want this backup job to run when the backup button on the front of the ReadyNAS device is pressed (note this applies to ReadyNAS desktop units only and does not apply to ReadyNAS rackmount units).

-
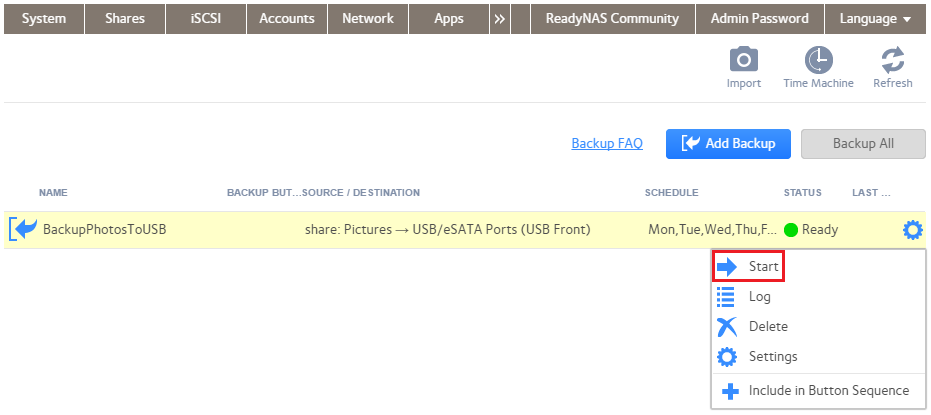
Run the backup job by doing any of the following:
- Wait for the defined scheduled time to arrive.
- Press the backup button on the front of the ReadyNAS device (only applies to systems with a backup button when a job is assigned to the backup button).
- Run it manually by clicking the gear icon on the job and pressing Start:
Note 1. If the USB disk is not detected by the ReadyNAS, here are some things you can try:
- Connect the USB disk to a PC. If it is detected there, try formatting it in NTFS or FAT32 and then safely eject the USB disk before connecting it to the ReadyNAS again.
- Reboot the ReadyNAS.
- Try using a different model of USB disk.
Note 2. A USB disk formatted in EXT4 file system will not be detected by a Windows PC by default. To view the contents of the disk from a Windows PC, you can connect the USB disk to the ReadyNAS and access it via the ReadyNAS or you can use an EXT driver for Windows such as http://www.ext2fsd.com/
Last Updated:04/25/2023
|
Article ID: 29654