Monday, April 22, 2024

Thimbleweed Quilters Outdoor Quilt Show 2024

These are just a few of the quilts from the show. I took photos of most of my favorite quilts. Some quilts were hard to get a good photo because of the bright sun pouring across the quilt, so I didn't get photos of those quilts. Enjoy the show!

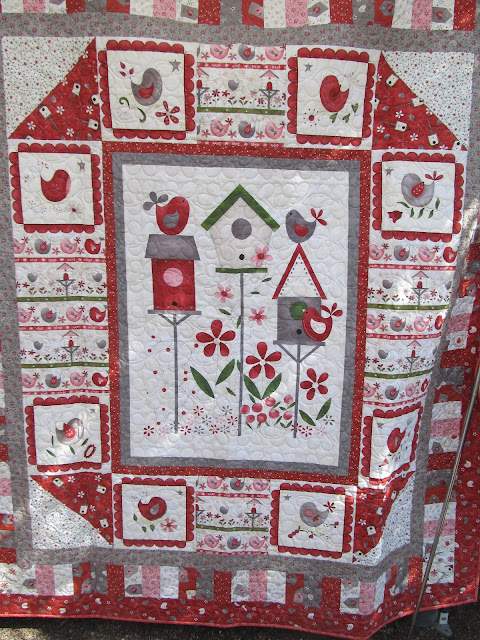
Quilt by Colleen K.


Made by Marlene W. This was all painted batting (except the binding)!


Made by Colleen K.


I love the Jetson's for the televison.


Made by Barbara S.

Closeup from above quilt.

Made by Mila V.


Made by Sue H.

Made by Sue H.

Closeup of t-shirt quilt (below)

Close up of t-shirt quilt (below)

Back side of t-shirt quilt (see quilt below)

This is a t-shirt quilt (not a panel). Those are all t-shirts!
                                                                  Made by Judy P. 

This quilt is also made using t-shirts from various travels by Linda H.

Pin It Now!

Sunday, April 21, 2024

Feather & Fan Knit Bottle Cozy for Spray Bottle (plus a dry iron review)


Hello my lovely friends. My spray mist bottle broke 😭!! I loved using that gentle mist of water to dampen my fabric when I press my fabrics. The trigger part was starting to have issues and I would have to pull it back into place after I used it. But then one day while I pressed the trigger, it just broke and wouldn't work anymore! I had 3 tall regular spray bottles, not the fine mist one I had, so I tried using it and it worked fine. The trigger on this bottle is what most spray bottles have. The bottle had printed on it "Window Cleaner" as you were supposed to add that to the bottle. (I rescued the 3 bottles from my daughter's give away stuff a while ago). I didn't want to put window cleaner in the bottle and I thought it would be nice to make a knit cozy for the bottle to not only cover up the wording on the bottle, but to have the bottle look nicer and use a bit of my yarn up too. So far this is working well to dampen the fabric for pressing.

You might be wondering why I don't add water to my iron and just steam the fabric? I will tell you why. I found out the hard way that irons do not last very long if you add water to them. Plus, they can rust inside and spit brown crud all over what you are ironing and thereby ruining your fabric or clothing! I only ever used distilled water and it still did this! Plus, have you read the instructions on steam irons? They all say to empty the water from the iron when you are done steaming. Does anyone do that? Even if you did empty the water, there is always a tiny bit of water and moisture that cannot be emptied out. So after the 2nd iron I owned died after a few short years (the first one, a Rowenta, died just after the one year warranty and it had other issues as well), I decided no more water in the iron and I have not had an iron die since then. 

Even if you have a steam iron and you use it dry, those steam holes will still accumulate dirt and dust and can and will come off on whatever you are pressing with the iron, so make sure you clean those steam holes out periodically too. My favorite iron is a Japanese designed dry iron made by Panasonic. What is a dry iron? It is an iron that has a smooth surface without any holes for steam as it doesn't have a water reservoir, therefore no steam holes to get clogged with crud. 

I bought a Panasonic brand dry iron about 3 years ago and love it! I got it from Amazon here. I am not an affiliate and these are my own personal opinions here. So what do I love besides it being a dry iron? I love that it isn't so darn heavy! So many of the fancy irons these days are so heavy to lift now that my shoulder starts to ache after a short while using them. The dry iron has a long cord and cleaning is much easier as the sole plate is flat and no steam holes to clean out. It has a thumb rest for for both right and left handed users. It is a slightly smaller size, but not as small as a travel iron. There is no auto shutoff and no beeping sounds to drive you crazy, either! (I had an iron that would beep and drive me nuts! It still works, but I had to unplug too often to shut it up, 😁). The Panasonic is a basic old school design. Some reviewers on Amazon complained all the wording was in Japanese, but hey turn the dial in one direction and it is going to get hotter and the other direction will be cooler, so find what level of heat suits what you are pressing and leave it there. Okay, I didn't mean for this to end up becoming just an iron review, 😂.

Here is the knit bottle cozy I made for the spray bottle. I used this free Iced Drink Cozy pattern to knit this, but just made the cozy taller by knitting more rows before starting the bottom of the cozy. I love this knit cozy pattern as it is so easy to knit and looks so great! I have made several of these for my drinking glasses as well. It looks great in a variegated yarn too, but for this bottle cozy I used a  solid color yarn with a bit of angora softness in it.

This bottle is taller than most spray bottles and narrower too, so the cozy fit it perfectly.

I love the feather & fan knit stitch.

The bottom of the cozy. While the pattern said to leave a quarter-size hole at the bottom, I didn't see the need for that and I closed it up pulling the yarn tight. I may make a few more in different colors of yarn to dress up the other 2 spray bottles I have too.

Happy knitting and pressing!


Pin It Now!

Wednesday, April 17, 2024

Mod Dog Wall Quilts

I just love these cute little Mod Dogs. I had made quite a few in pinks and in browns last year, thinking I would make a quilt using them. I wanted to create my own setting and not follow the pattern exactly, but nothing I auditioned the dogs on really looked that great to me. So I decided to make a couple of the dogs into small wall quilts (or they could be a placemat or large mug rug or table topper too). I had some that I made looking right and some looking left, so I grabbed one of each direction and color and appliquéd them to a wavy quilted background. 

These each measure 13" wide X 9 1/2" high.


Brown Mod Dog

Pink Mod Dog

These are a fun way to use up those never-ending Pile of Scraps!!!


Pin It Now!

Friday, April 12, 2024

Twister Quilt

I love making Twister quilts! I have made several in the past. I usually use the 5" size Twister Tool to cut the Twister Pinwheels, but this time I used the 6.5" size and I like the larger pinwheel effect. I may try doing the next Twister with even larger blocks.

This quilt measures 36" x 36". I backed it in a bright yellow flannel. I grabbed all the pieces of fabric scraps that I had that were large enough to put into this quilt. I put it in the gift shop to sell it, so we'll see what happens. If it doesn't sell then it will be donated to Project Linus. That is always a great option for me to donate something that doesn't sell and I would say more than half of what I take there doesn't sell for whatever reason, I really don't know? I price them about or even cheaper than someone could make their own quilt so that is sells. It is easier to try sell at the giftshop than to sell online, which for me is much harder to do. I want to spend my time sewing and creating, rather than promoting myself all over the internet! 😜The time doing that takes away the joy and the time that I have to create and sew. Okay enough of that and on with the Twister Quilt!


Closeup
I used a Serpentine stitch to quilt in a diagonal grid.

another closeup

Flannel backing showing the Serpentine quilting stitches
Soft yellow flannel backing showing the Serpentine stitching.
Let's do the Twist!😁

Pin It Now!

Tuesday, April 9, 2024

Sew Powerful Purse #62 (2024) for a Special Girl

Sew Powerful sent out their newsletter and they had a small fundraiser that 20 people could join in doing. The idea was to make a purse and mail it to one of the women who is going on the trip to Zambia with some other people in May and she would hand deliver your purse and get a photograph taken of the girl with the purse that you made. There was a donation fee to be paid too, of course. I jumped on this as soon as I read it! I didn't know if I would ever be able to make the trip to Zambia and hand deliver several of my purses to girls, so this was the next best thing! I am so excited to see the girl who receives my purse.

I wanted this purse to be special. I had purchased several canvas prints last year and made one flap, but I couldn't find it! I looked everywhere too. Well it will turn up one day and I will finish making that purse. So in the meanwhile, I grabbed another print and made this flap and completed the purse.

I was at my quilt group last Thursday and won the nametag drawing (again)! That's twice this year I have won. I hadn't won anything in several years past. I received 2 fat quarters of fabric, some sock monkey buttons, a spool of metallic pink thread and a magnetic pin cup. Yay!!! So I used the fat quarter to make the exterior and the other one for the main lining of this purse, but had to use a fabric I had for the flap lining as the fat quarter wasn't large enough to cut all the lining pieces.

I sewed ribbons around the canvas print to bring it up to flap size, stitching each ribbon in place with a decorative stitch using a variegated thread, then I added some buttons, a handmade label, and stitched a decorative stitch down the center of the webbing too.

The flap with the added sewn ribbons around the flap. The canvas print was actually taller with the full dress showing, so I had to cut the height down to fit the height of the flap.

Showing the entire flap and part of the back of the purse
Here is the full view of the flap, since about 2-inches folds to the back side and you couldn't see those other ribbons.

Back fo the purse with a slip pokcet
Back of the purse I added a slip pocket and I sewed in 2 strips of the lining fabric to make the pocket wide enough.

Showing front of purse with flap lining
Front of the purse shows the pocket under the flap and the flap lining.

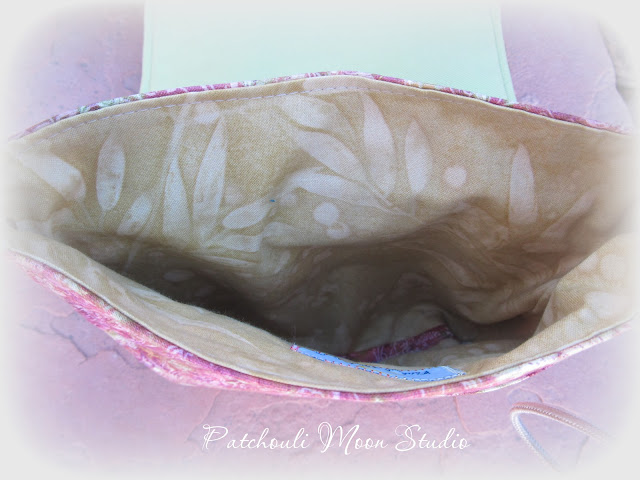
Peeking inside purse to show lining fabric
Peeking inside the purse to show the lining fabric.

I have several more canvas prints of women that are all different, that I can create more purses for more girls in the future. But I better get the purses I have cut out in kits finished up first. Then I can cut more kits to have ready to sew.

I should have a photo of the girl with this purse sometime in June, so be sure and come back to see it. 

Happy Purse Sewing!


Pin It Now!

Monday, April 8, 2024

4 Scrappy Free Form Log Cabin Style Quilts for Project Linus Donation

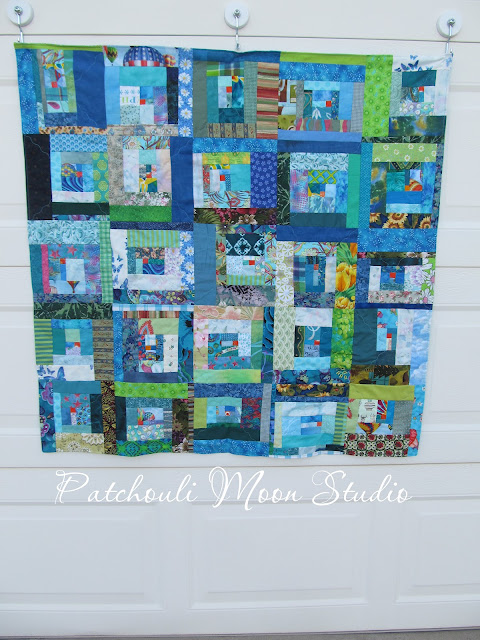
Hello my crafty, sewing friends. Several months ago I got the idea to make a free from scrappy quilt using my turquoise scraps and a tiny orange center for each block that I made. Well, I didn't plan it out very well as I just kept sewing scraps and I had so many blocks started, but very few that were squared to the 8.5" square size I wanted, so I had to add blue scraps and green scraps as well as the turquoise I started with, 😜.  Then when sewing the blocks together, I didn't want huge quilts, so I made 3 square quilts at 40" x 40" and one that was a bit longer and a rectangle instead of square. I actually made 2 rectangle ones, but I will share that one another day, as I am going to see if I can sell that one first at a gift shop. If it doesn't sell, I will donate it too.

I love piecing scraps to make these free form log cabin style quilts. No rules, no mistakes, just sewing fun! They can be sewn with any width scrap (from 1" to about 3") and sewn in the Log Cabin style (sewing around and around in a clockwise fashion) or the Courthouse Steps style (sewing strips across from each other) or both ways in the same block. I choose where I want to sew the scrap based on the length of the scrap piece. Sometimes I don't have a long enough strip to sew on a certain side, so if it fits on a different side then that's where it gets sewn.

I backed all of these quilts using soft flannel. In fact, I didn't add any batting at all. I just sewed the backing and the top right side together, left an opening and turned them. I press them, topstitched all around, which closed the opening, and quilted to hold the 2 layers together in a Serpentine Stitch on the diagonal. The pieced top with the flannel backing was heavy enough as is without any batting and the quilt has more drape too. 

I like to add an appliqué animal or a flower on my scrappy quilts that get donated, but these were so busy, that when I auditioned a large appliqué by placing it on top, it got lost, so no appliqué for these quilts. I will have to choose a different light color to piece next time in order to add some appliqué to the quilts.

5 blocks across x 5 blocks down (8" finished blocks) makes this quilt 40" x 40".

Backing is flannel with Peace Signs
The flannel backing I used was Peace Signs. I love how soft the flannel makes a quilt more cuddly.

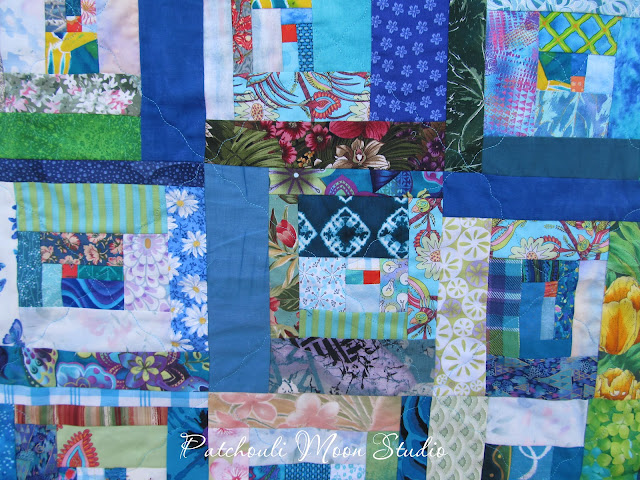
Close up
Closeup of a few blocks.

This is the rectangle shaped quilt as it has 5 blocks x 6 blocks, making it 40" x 48".

Close up
Close up look.

Royal blue flannel backing
Royal blue flannel backing.

Another 40" x 40" quilt.

Close up
There are a lot of fun scraps in these quilts. Sort of an "I Spy" quilt, making it fun for the child to find all sorts of things, like the ballerina pig above.

Close up
Another close up.

Royal blue flannel backing
This was also backed in royal blue flannel, but I needed to add a strip of the floral print flannel to make it big enough at the top.

40" x 40".

Close up
I spy a hot air balloon, butterflies & flowers.

Blue floral flannel backing
This flannel backing is the floral print.

Happy Scrappy sewing!


Pin It Now!
Related Posts Plugin for WordPress, Blogger...