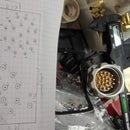
Introduction: Truss Bolt Bin.
We are a theatrical lighting equipment rental company. One of the things we rent is truss. Each section needs four sets of bolts with washers to attach it to the next section. We are constantly having to count them out for each order, and they have been living in a barrel on the floor. Which means when we get lot, there is a lot of bending over which is hard on the back.
Another problem is that sometimes the bolt sets come unscrewed, and the individual peices float down the the bottom to accumulate there. That means the unlucky person who is pulling from the bottom of the barrel, is also having to reassemble the sets from the loose bits.
So we bought a bunch of chain, which got delivered in this fiberboard drum. I saw the empty drum and had an aha! moment. Whomped up the little stand there with some of the offcuts of plywood we had laying around. Making the table just a little bit bigger than the size of the bin. Sides sticking up to keep the bolts from tumbling onto the floor. front and back also have small walls sticking up to hold stuff in. Sides also protrude down to provide better attachment for the legs. Legs were 2x6 that had been discarded from another project due to being warped. Carved a opening into the side of the barrel as you see in the picture. I wrapped the lower portion in some fiberglass reinforced packing tape to give it a bit more strength.
Drew an oval in another piece of plywood. Then I trimmed it down bit by bit until it slid into the drum providing the sloping surface leading down to the opening. Cut the front and rear edges of the oval at an angle to fit the drum a bit better inside. If I were to make another one, I'd make it a little longer front to back, and the front lip a little bit taller, as bolts will sometimes tumble over the front edge.
Tools used: jigsaw and circular saw to cut the wood and the fiber drum. Nail gun to stick all the wooden bits together while the glue cured. Only thing I actually measured was the table surface. Everything else was just held up and marked with pencil where it needed to be cut. Quick and dirty job made with what I had on hand. Took the last hour of work on a friday afternoon to make it up. If it's stupid but it works, it ain't stupid.


