-

Qualtrics Platform -

Customer Journey Optimizer -

XM Discover -

Qualtrics Social Connect
Tableau Extension
About the Tableau Extension
The Qualtrics-Tableau extension enables organizations to connect their desktop and server Tableau products directly to Qualtrics to gather and view data in real-time.
Requirements
To use the Qualtrics extension with Tableau, verify that your license has the Tableau Integration and Access API permissions enabled. If you are not sure if you have the proper permissions, contact your Brand Administrator. If you are a Brand Administrator would like more information about the Tableau extension, contact your Qualtrics Account Executive.
Please note that you must have Tableau 2024.1 or above to use this extension.
Identifying Your Login Credentials
You must log into your Qualtrics account to connect it to Tableau. How you connect your account will depend on how you normally log into Qualtrics:
- If you normally log in with a username and password, you will use them to connect to Tableau. You can find your Qualtrics username and change your password in your user settings.
- If you normally log in with SSO (e.g., with a third-party login, such as Google), you will connect to Tableau with your Qualtrics API token. You can find your API token in your account settings.
Exporting Data from Qualtrics to Tableau
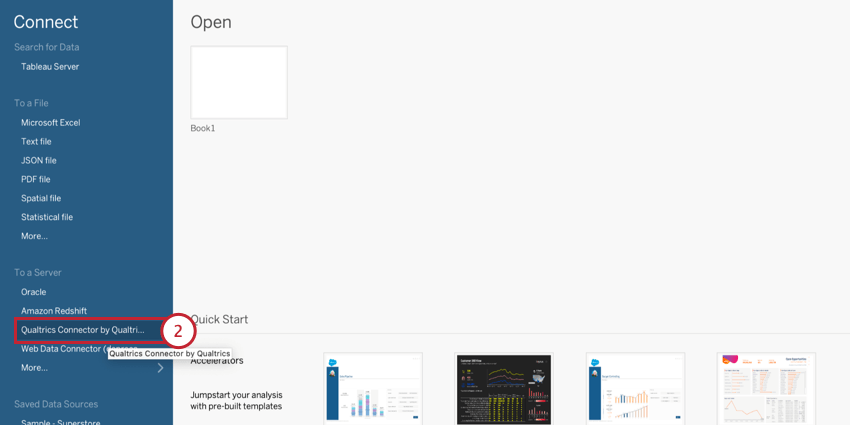
- Download the Qualtris Connector by Qualtrics extension from the Tableau exchange. See this Tableau support page if you need help adding an extension to your account.
- Once installed, click the Qualtrics Connector by Qualtrics.
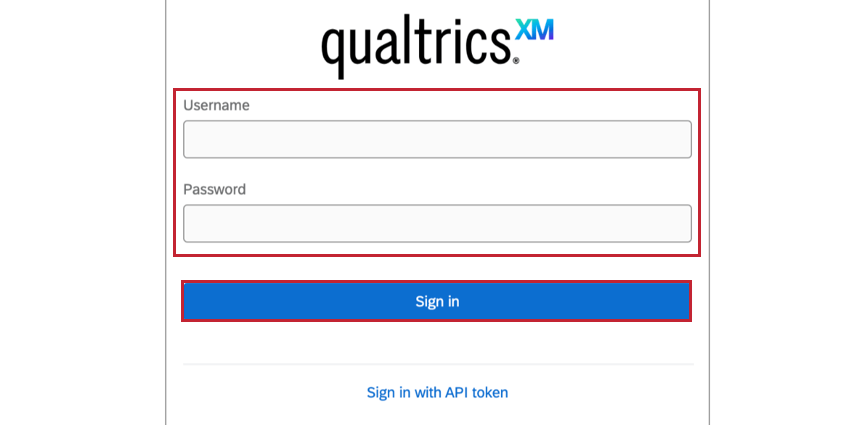
- Connect your Qualtrics account by entering your Qualtrics credentials. See Identifying Your Login Credentials for more information about which login method to use:
- Username and password: If you log in with a username and password, enter them on the login screen and then click Sign in.
- SSO: If you log in with SSO, click Sign in with API token.
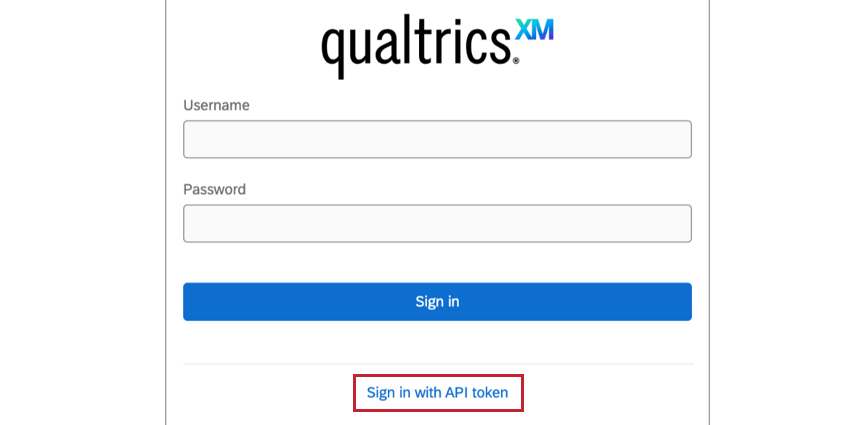
Then, enter your account’s API token and click Sign in.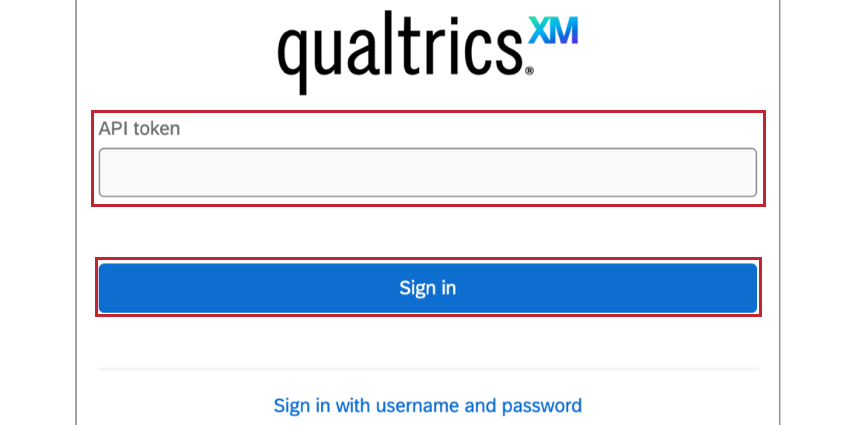
- Username and password: If you log in with a username and password, enter them on the login screen and then click Sign in.
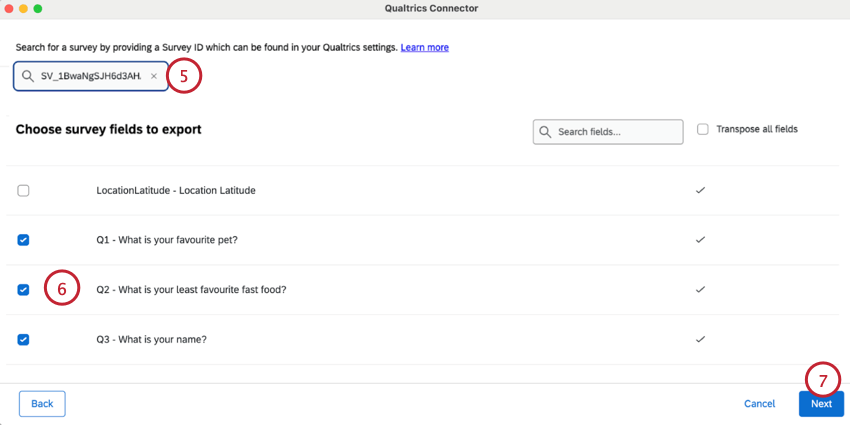
- Enter the Survey ID of the survey you want to export data from. See Locating Survey IDs for more information on finding your survey’s ID.
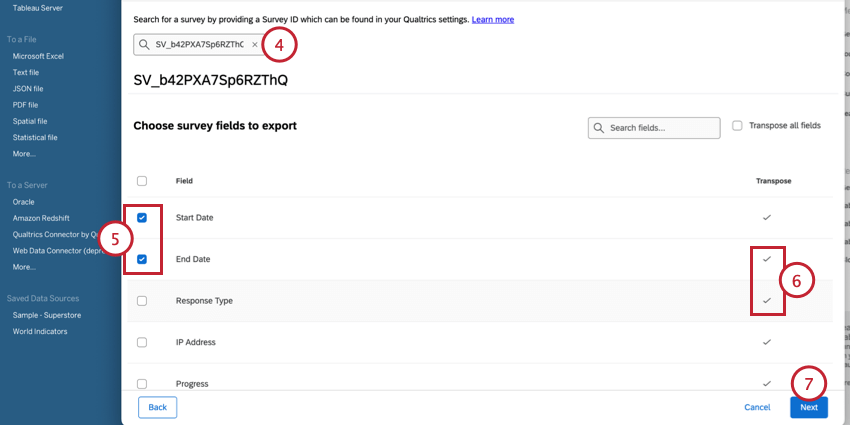
- Choose which fields you want to export. Selecting the box next to Field will select every survey field.
Warning: Performance of the data connector is likely to slow down when you import more that 60 fields. If you need to import more than 60 fields, we recommend importing them in with separate connectors, and then joining the datasets together in Tableau.
- Choose which fields you’d like to transpose. Fields with a checkmark will be transposed. Selecting the box next to Transpose all fields will select every field.
- Click Next.
- Select the Tableau fields that correspond to the types of fields you’d like to transpose. See the Transposing Data section for more information about how these Tableau names correspond to Qualtrics fields.
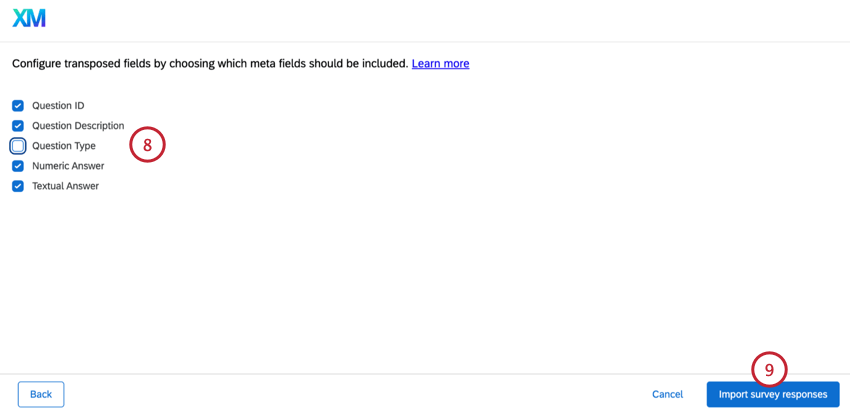
Example: For example, if I’m transposing numeric NPS scores, I would select Numeric Answer. - Click Import survey responses.
Transposing Data
In order to get the most out of your data that is imported into Tableau, it is important to understand the Transpose feature. Transposing a field will group it based off of the selected options from the Transpose options menu. All transposed fields will be combined and displayed as the selected Transpose options at the top of your data list in Tableau. Fields that are not transposed will be listed below those that have been transposed and grouped by question number.
A general rule of thumb is to transpose numerical data, and leave categorical data untransposed. For example, suppose you collect demographic information on an NPS survey. You would be interested in transposing the NPS values so you can see numerical counts of each NPS score. You would then leave the demographic questions untransposed so you can see each NPS score broken out by demographic.
When transposing data, some of the data types are labeled differently in Tableau than within Qualtrics. Here is a list of what they are called in Tableau and the corresponding name within Qualtrics:
|
Tableau Label |
Qualtrics Equivalent |
| Question ID | Question number |
| Question Description | Question label (or question text if label is empty) |
| Question Type | Question type |
| Numeric Answer | Answer choice recode value |
| Textual Answer | Choice text / variable name |
Viewing Data in Tableau
This section covers how to view your Qualtrics data once it is imported into Tableau.
Once the above setup is complete, you will see your survey available in your Connections. Click your survey to view the fields included in your data.
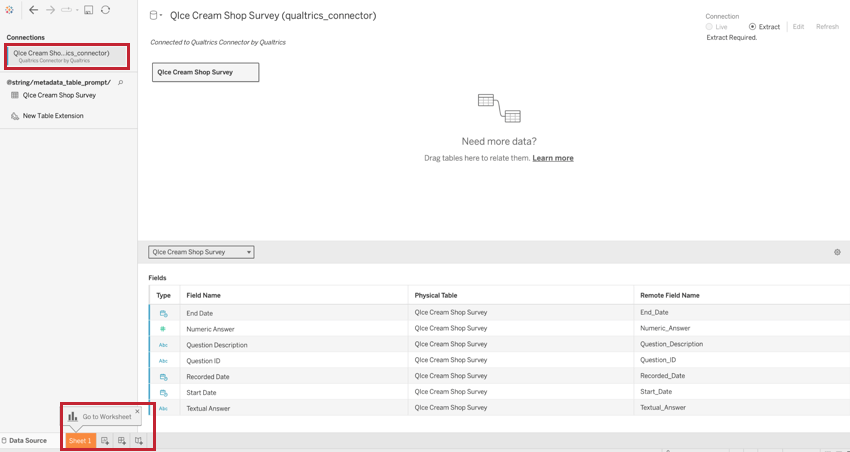
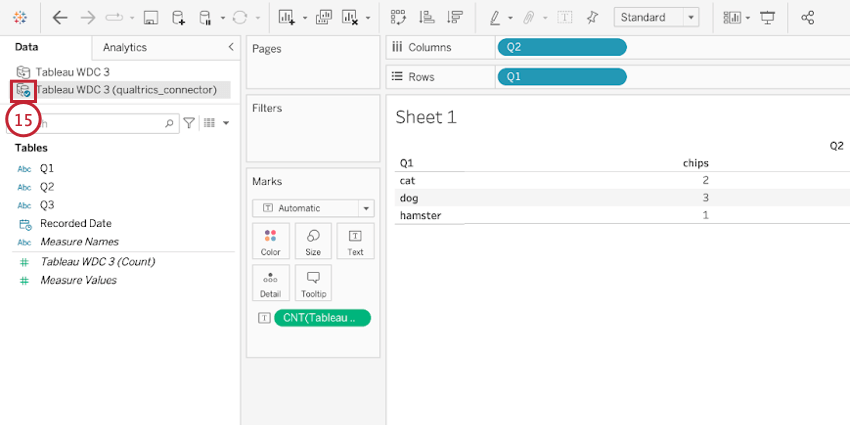
To view your individual data tables and response data, click Go to Worksheet at the bottom of the page. You can click on any of the Tables listed on the left to see data organized by that field.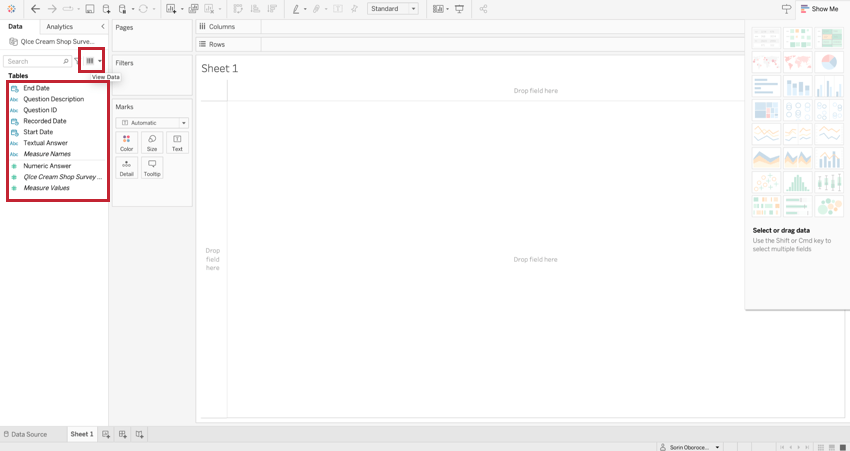
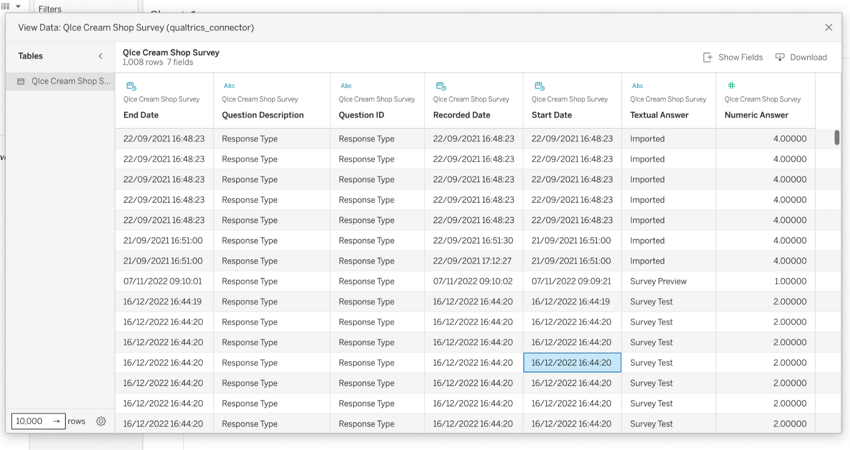
Click View Data to see a table containing your individual responses.
Refreshing Data
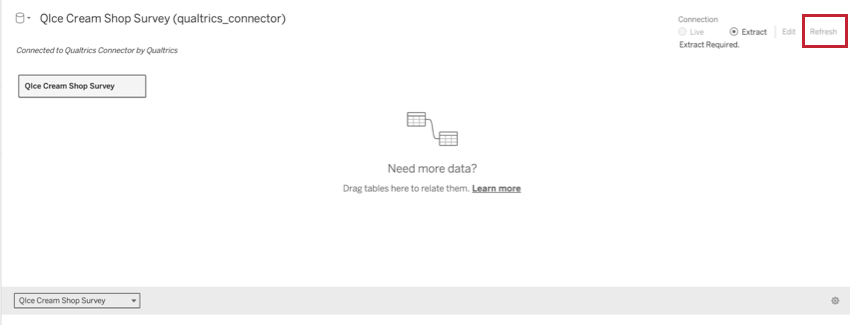
You can manually refresh the data displayed in Tableau to pull in newly collected responses. To refresh your data source, click Refresh in the top right corner when viewing your data in Tableau.
Migrating to 3.0
Follow the steps in this section to migrate your legacy Tableau extension to the updated WDC 3.0 version.
- In your old data connection in Tableau, click Data.
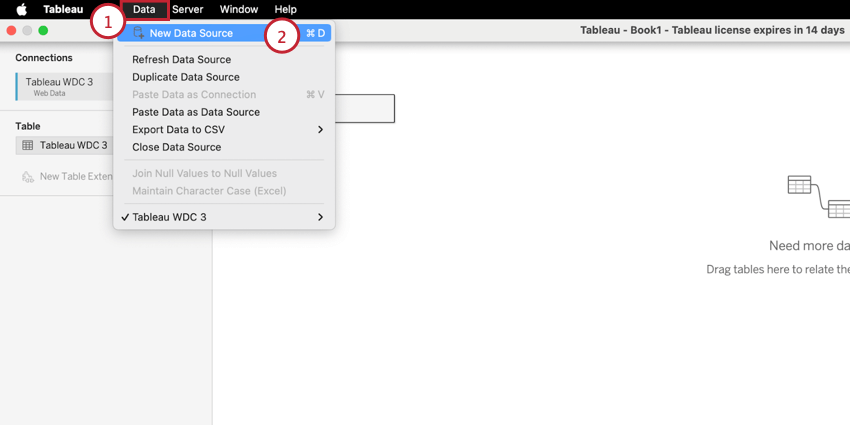
- Select New Data Source.
- Select Qualtrics Connector by Qualtrics.
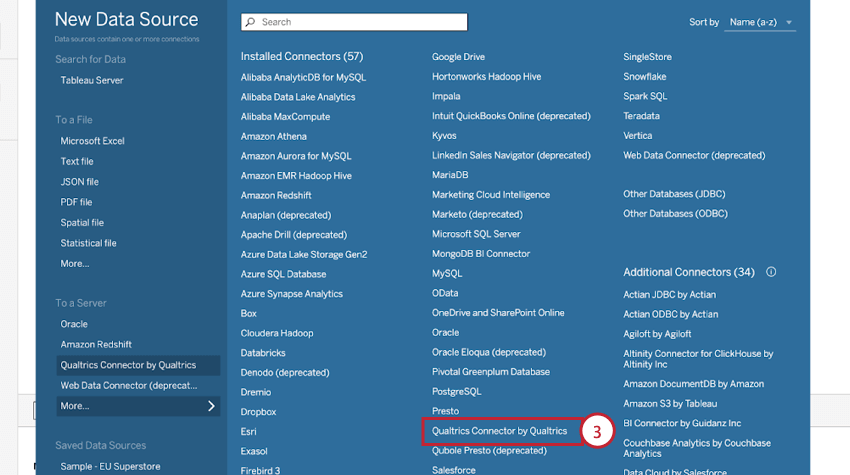 Qtip: Use the search bar at the top of the window to quickly find the right connector.
 - Follow the instructions in Exporting Data from Qualtrics to Tableau to set up a new extension using the WDC 3.0 connector.
- Choose the survey ID for the survey you used in the old extension.
- Select the exact same fields you used in the old extension.
Qtip: You can find the list of fields that you exported previously in the Data Source section of the data source that you are trying to migrate.
- Click Next and complete the extension setup.
- Once complete, you will see a Data Source tab for your new extension.
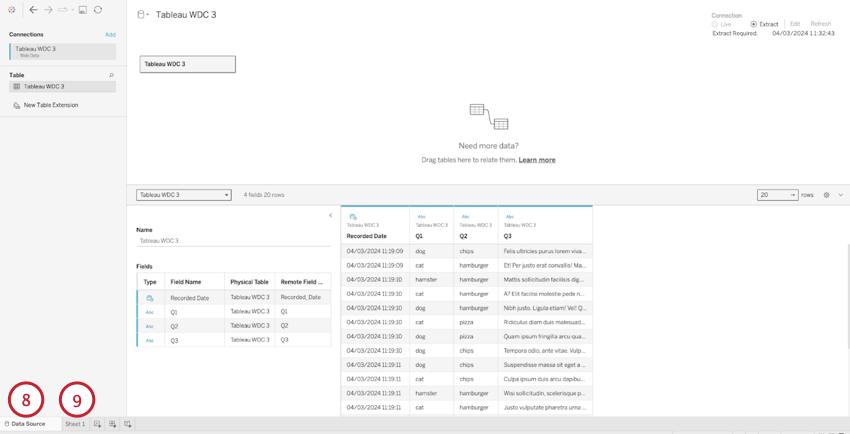
- Go to the Sheet 1 tab.
- Right click on your newly created data source.
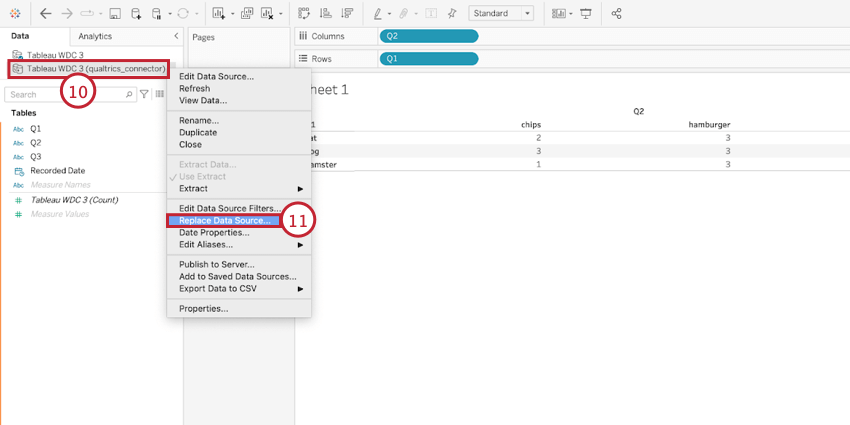
- Click Replace Data Source.
- Make sure your legacy data source is selected for the Current field.
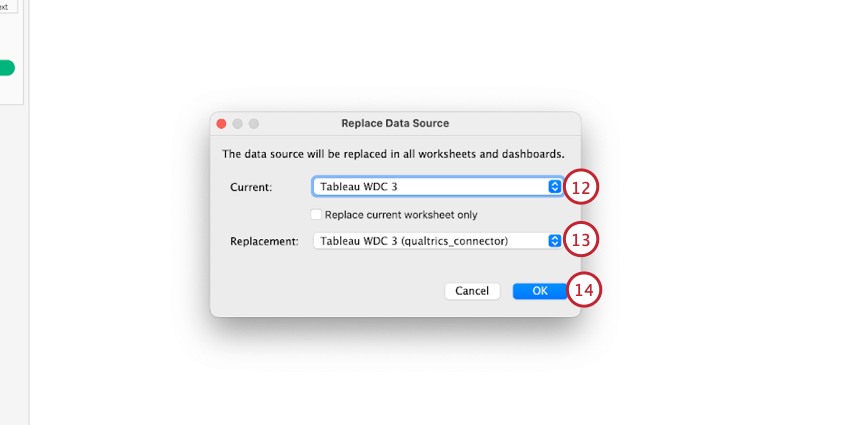
- For the Replacement, choose your newly created data source.
- Click OK.
- A blue checkmark will appear beside your new data source. This means that your Tableau sheets are now using the new data source.
Legacy Setup Steps
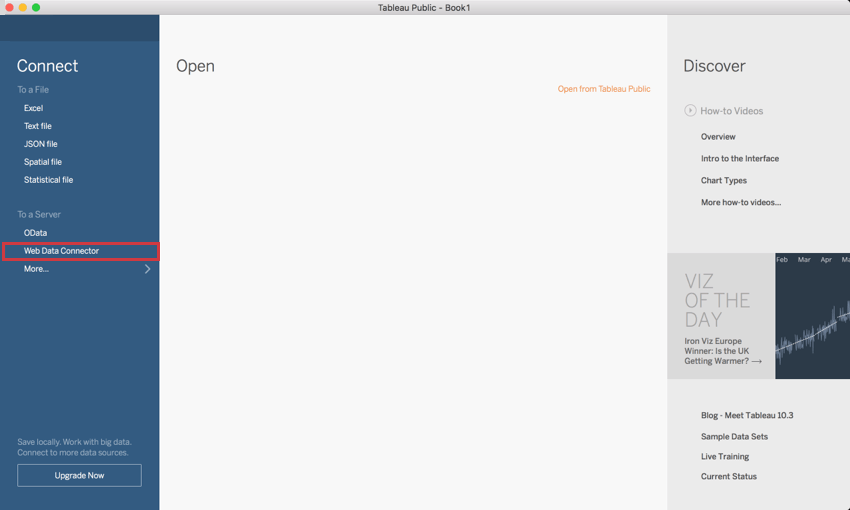
- Under the Connect menu in Tableau, select Web Data Connector.
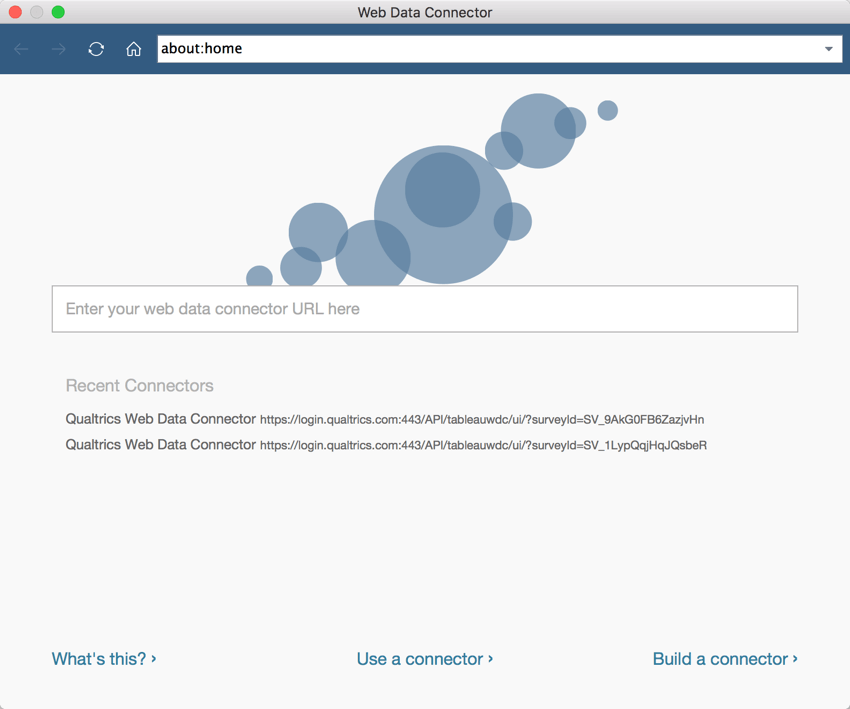
- A window will appear that prompts you for a web data connector URL.
- In your Qualtrics survey that you would like to connect to Tableau, navigate to the Data & Analysis tab.
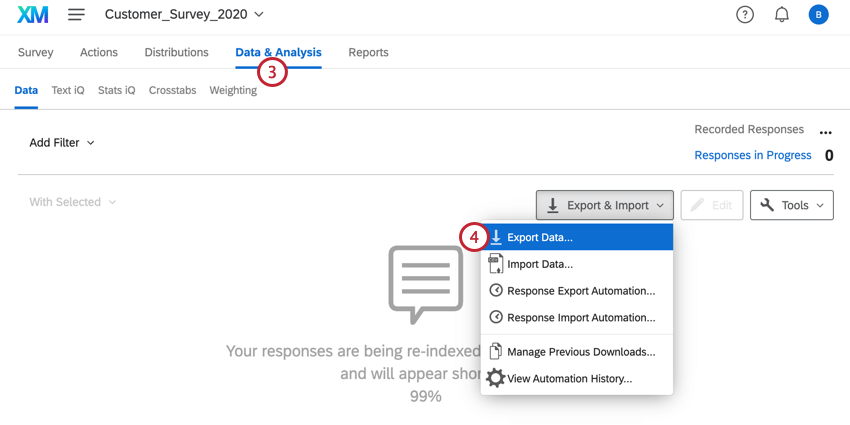
- Under Export & Import, select Export Data.
- Select the Tableau export format and copy the URL provided.
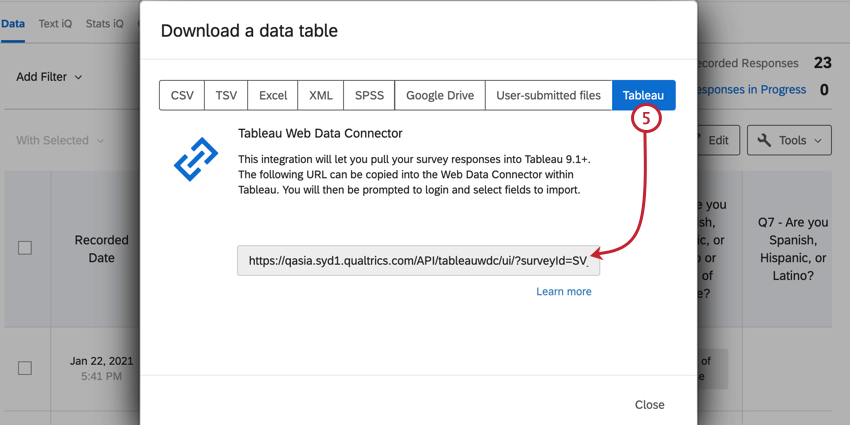
- Paste the copied URL into the Tableau Web Data Connector shown in Step 2 and hit enter on your keyboard.
- Log in with your Qualtrics credentials, detailed above.
 Qtip: If you are an SSO user, you will need to use your API token. If you are not an SSO user, simply log in using your Qualtrics username and password.Qtip: If you’re connecting via Tableau Bridge instead of Tableau Desktop, you’ll need to input your User ID for the username and API token for the password. The API token can be found in your Account Settings.
 - Use the checkboxes next to the field names to select which fields you want to import. Selecting the box next to Field will select all of the survey fields.
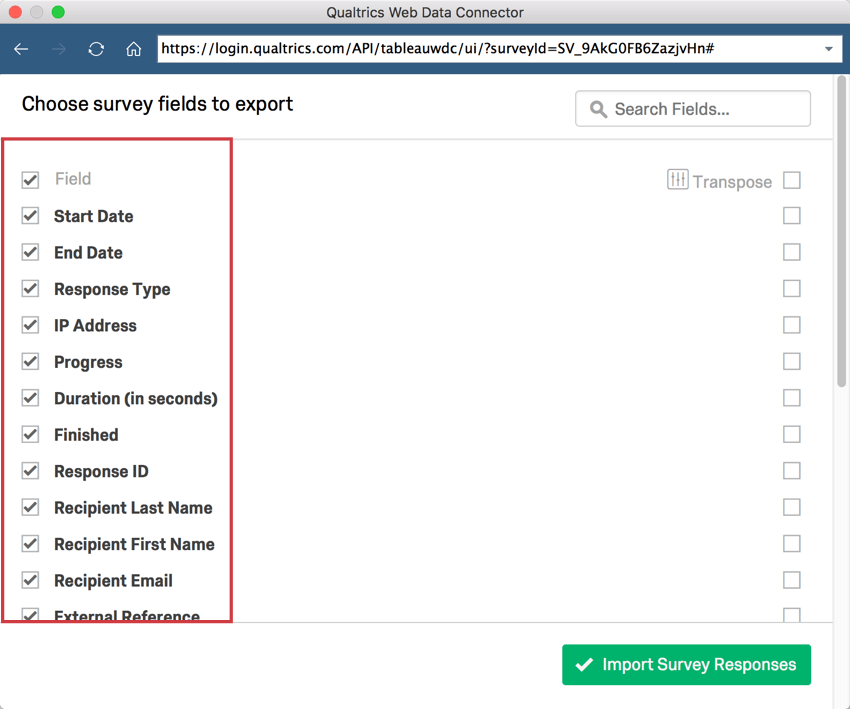 Warning: Performance of the data connector is likely to slow down when you import more that 60 fields into a single web data connector. If you need to import more than 60 fields, we recommend bringing it in with separate connectors, and then joining the datasets together in Tableau.
 - Select the checkboxes next to the fields you would like to transpose. (See below for further details on transposing your data.)
- Click Import Survey Responses to import your data into Tableau.
- After connecting to Tableau, in order to pull in new responses, refresh the data source. To refresh the data source, select the Data menu, choose your data source, and then select Refresh.
Qtip: If you receive a allowlisting error when refreshing your data in the Web Data Connector, see this Tableau support page for more information.